Lascar EL-USB-ULT-LCD+ High accuracy USB Data Logger with LCD and Ultra-Low Cryogenic Temperature Probe
Change Currency
High-accuracy ultra low temperature data logger for monitoring vaccines in cryogenic dry ice storage
This high-accuracy ultra-low temperature data logger is designed for monitoring vaccines in cryogenic dry ice storage. The measurement range is -100 to +100°C (-148 to +212°F) using the probe supplied with the logger.
The device can record over 32,000 readings and the on-board display can cycle between the current, minimum and maximum temperature readings at the touch of a button. Flashing lights alert users to any temperature excursions. The logger is simple to set up using the free EasyLog software, which allows users to set their own high and low alarm thresholds, with alarm hold and delayed start features as well.
Just plug the logger into your PC's USB port to download data which can then be graphed, printed and exported to other applications for detailed analysis.
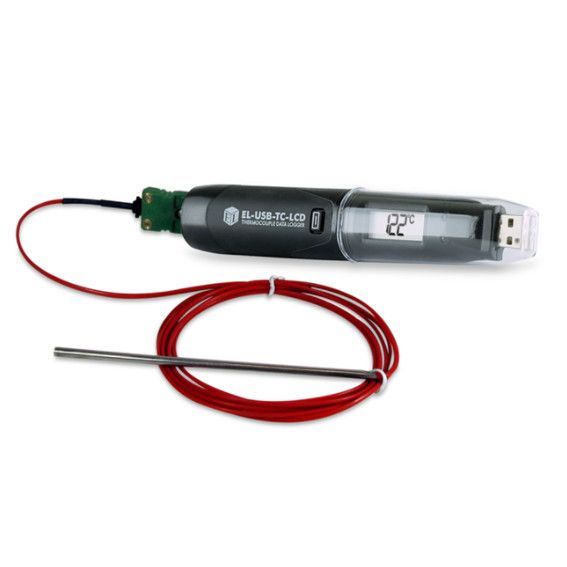
The product is supplied with a ½ AA battery, the probe (300mm probe on a 2m long cable) and a mounting bracket.
Applications
The EL-USB-ULT-LCD+ ultra-low temperature data logger is designed for monitoring vaccines in cryogenic dry ice storage and transit.
Specifications
| Model | EL-USB-ULT-LCD+ |
|---|---|
| General Description | High accuracy USB Data Logger with LCD and Ultra-Low Cryogenic Temperature Probe |
| Communications Protocol | USB |
| Accuracy | ±1.8°C (±3.2°F) typical |
| Readings | 32,510 |
| Resolution | 0.5°C (1°F) |
| Logging Interval | User selectable between 1 second and 12 hours |
| Battery | Supplied with a ½ AA battery. Battery life: 2 years |
| Dimensions | Logger: 135 x 24 x 21mm (5.31 x 0.94 x 0.82"). Probe: 300 x Ø1.5mm x 1m. Cable: 11.8 x Ø0.06" x 39.4" |
| Temperature Range | -100 to +100°C (-148 to +212°F) |
| Operating Temperature | (Logger only) -10 to +40°C (+14 to +104°F) |
EasyLog Data Logger Setup from Lascar Electronics
Learn about Lascar's standalone data logger. This product is equipped with a LCD screen and ranges of temperature, humidity, dew point and probe data loggers. Download the software at http://www.lascarelectronics.com/data-logger/easylogger-software.php Subscribe to our YouTube channel: https://www.youtube.com/channel/UCnPPNTtodIDopvuiMXhKOGQ Download our Data Logger catalogue for free: http://www.lascarelectronics.com/pdf-usb-datalogging/data-logger0852761001443617044.pdf Add us on Facebook: http://www.facebook.com/lascarelectronicsinc/?fref=ts Follow us on Twitter: http://twitter.com/lascarlog In this video I will show you how to setup your USB data logger To begin click “set up and start the USB data logger.” You are presented with a number of options: First, you can give each data logger a unique name- this will help you identify individual loggers quickly. Next, you can choose between degrees Celsius or Fahrenheit. Then choose how often you want the logger to take a reading, you will note with these options in brackets it shows how long it will take the data logger to fill up with data. Once that is complete click next If you have a data logger with a display, you have a few options relating to the display. Firstly, how often do you want to look at the display.You can choose to have the LCD off, on for 30 seconds after you press the button, or on at all times. Choosing to be economic with the use of the display will improve the battery life of the logger. Next you can choose if you want the data logger to stop when it is full or whether you want it to roll over and continue to take readings. If you are simply interested in alarms, then perhaps a rollover option is a better fit for you. If you need to download and save all readings, then programming the logger to stop may be a better option. Once that is complete click next This next page is alarm setup. You are going to set alarms for temperature so click on this tick box here which will allow us to set the high temperatures. Using the scroll down button here choose the appropriate value. You will note to the right hand side, that there is a tick box saying hold, this is a feature that will continue to show an alarm condition even if the temperature has returned to a normal condition. I will do the same for the low alarm, and select the appropriate temperature. Then select hold for both of them. If you wish to not setup temperature alarms leave the boxes unticked and click next . If it is a humidity logger you can do the same for the relative humidity page, but i’m going to leave these for the time being. If you are using one of the thermistor probe loggers there are options for the probe type as well - you just need to make sure that the selection matches the probe type you have. Finally you can set up how you want the data logger to start. You can start with an immediate start, to start when the data logger button is pressed or select delay the start, which allows you to put a set time and date that you want the data logger to begin recording. Once that is complete click Finish and your data logger is now complete, simply click "Ok" to exit. Now you can take the data logger out of the USB port and place it in a desired location as it is ready to start taking data


We only ship worldwide by UPS, but you can use your own courier account (UPS, DHL, FEDEX only) by selecting this option at checkout.
You will need to input your shipping account number in the checkout notes when choosing this option to avoid a delay shipping your order.
Our shipping fees are priced by zone set by UPS - click here to see our full postage and delivery terms, or choose your country using the dropdown menu at checkout to get an accurate shipping cost.